As stated previously, rather than using the default starter theme that we selected during the setup process (i.e. @frontity/mars-theme
) we are instead going to develop a custom theme from scratch. To do this we need to create a new package for our theme's code. As it's our first ever theme let's call our theme "my-first-theme".
NOTE: Before continuing you may need to stop the dev server process that we ran previously with CONTROL+C.
To create a package run the following command in the terminal:
> npx frontity create-package my-first-theme
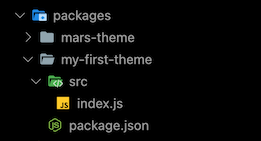
You will be prompted to specify the namespace to use. Since you are creating a theme you can use the default theme
, so you can just press Enter at this point.
When the process is complete you will have a new directory called /packages/my-first-theme
. This is where we will be doing most of our work to build the theme.
The first thing we'll do is to remove @frontity/mars-theme
from our settings and replace it with my-first-theme
.
Remove the following from the file frontity.settings.js
:
// File: /frontity.settings.js{name: "@frontity/mars-theme",state: {theme: {menu: [["Home", "/"],["Nature", "/category/nature/"],["Travel", "/category/travel/"],["Japan", "/tag/japan/"],["About Us", "/about-us/"]],featured: {showOnList: false,showOnPost: false}}}},
And replace it with:
// File: /frontity.settings.js{name: "my-first-theme"},
We've now told Frontity to use our new theme rather than "mars-theme". Save the file and then run this command again:
> npx frontity dev
If you see this in your browser then everything is working. Hooray! 🙌
Check you're on the right track by comparing your changes with the ones in this commit.