Create a Frontity Project
The first thing we are going to do is create a new Frontity project. As it's our first time exploring Frontity let's call our project "hello-frontity".
To create the project, open up your terminal, navigate to the directory where you want to install your new project, and run this command:
npx frontity create hello-frontityWhen prompted select the mars-theme - it's the basic starter theme that we recommend for beginners.
We won't be using mars-theme, we will instead be using the custom theme that we will build over the course of this tutorial, but you need to select a theme during the setup process.
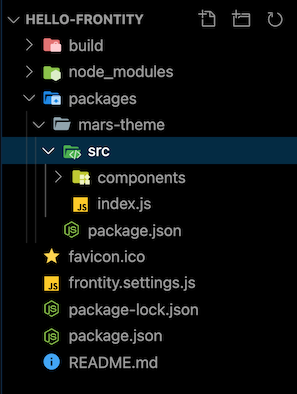
When the install process finishes, you will have a new sub-directory called hello-frontity containing your project’s code. The structure of the project will look something like this:

Apart from defining the configuration of our project almost all of our time will be spent working in the packages directory.
The node_modules directory is where all our dependencies are stored. You won't need to modify or open any of the files inside this directory. The build directory is where the final deployment build of our project will live.
Other files such as package.json and package-lock.json are project configuration files and you shouldn't have any need to touch them either.
Let's take a look at the file frontity.settings.js. This is the configuration file for our project and can be found in the root directory of the project. One of the elements that you'll see here is an array of packages. In Frontity everything is a package, including the theme, so one of the packages in the array is @frontity/mars-theme. We'll be replacing this in the next lesson.
Another package in the array is @frontity/wp-source. This has a property: state.source.url. This is where you define the WordPress site that you want to connect to in order to get data from the REST API. Changing this is one of the first things you would normally do when configuring a Frontity project, but let's leave this as it is since this is the source for the data that we are going to be working with during this tutorial.
Now that we have our Frontity project set up and we've had a good old poke around to see how it's structured and configured let's test that everything is working.
Change into the project directory and start a development server:
npx downloads an npm package to run just this one time and then removes it from your computer - learn more here.
A new browser tab should open automatically for you. If it didn't then open http://localhost:3000 in your browser.
You should now see your first Frontity project. At the moment it's using the "starter theme" that we selected earlier, i.e. @frontity/mars-theme, and it is connected to our test WordPress site (i.e. https://test.frontity.org as defined in frontity.settings.js at state.source.url) which you will see contains a travel blog as its content.
In the next step we'll start creating our own Frontity theme.
Last updated